Home » Articles posted by Tessa Sanderson
Author Archives: Tessa Sanderson
What Is Residential Painting?
Alvarez Painting LLC transforms a home’s interior and exterior into a comfortable, inviting space. Professional painters can create a dramatic impact with accent walls, color transitions, and more.
While residential paint jobs are typically smaller in scope, the tools and equipment required for proper preparation are the same as those used on commercial properties. This includes paintbrushes, rollers, step ladders, tape, and cleaning materials.

Colors play an important role in residential painting. They can help hide the blemishes in your house and create an attractive space that will appeal to anyone who enters it. It is also important to use a color scheme that matches your home’s decor. You can use the color wheel to help you choose paint colors that complement each other. You can also look at the Colors of the Year for inspiration. There are also tools available that can make the process easier, such as My Paint Colors and CertaPro Painters virtual house painter.
A few color schemes work well in interior residential painting, including a monochromatic color scheme. This color scheme uses different shades of the same color, making mixing and matching accent pieces easy. For example, light blue can be used for the wall and ceiling, while a darker shade can be used for trim and furniture. This color scheme is ideal for rooms where you want to keep the walls neutral but still have a pop of color.
If you need help figuring out where to start, try perusing design/decorating magazines or books for ideas. You can also find inspiration from the things in your house, such as a picture or rug. You can look in your closet to see the most prevalent colors in your clothes. Color values, which refer to the darkness or lightness of a hue, are another aspect to consider when choosing a color scheme.
For an exterior color scheme, you can choose a color that matches the color of your home’s trim, window frames, or shutters. You can also choose a more vivid color to highlight the front door or other focal point. Using complementary colors is one of the most popular color schemes, as it helps create contrast and add visual interest to your home.
While white remains a popular choice for the exterior of a house, there are many ways to make it more modern and appealing. For example, you can use a tan shade and a light steel blue for the siding and trim to create a sophisticated yet warm aesthetic. This color scheme can be used with a bright red for the front door, which signals guests should come inside.
The painting process involves some steps that should be taken seriously to ensure the quality and durability of your paint job. While many homeowners focus on choosing the right paint color or picking up the best brushes and rollers, surface preparation is a crucial aspect that must be noticed and timely. A clean, well-prepared surface allows the new coat of paint to adhere properly, preventing cracking, chipping, and peeling.
The first step in any residential painting project is thoroughly cleaning the existing surface. This can be done with a pressure washer, soft brush, and mild detergent. In addition to removing dirt, dust, and grease, removing any loose or flaking paint is also important. After cleaning, the surface should be sanded to provide a smooth base for the new coating. This step is especially important for exterior surfaces because it prevents moisture and dirt from seeping into the surface’s pores, causing premature cracking and peeling.
A few different types of surface preparation are used in residential painting, including sandblasting and power washing. Sandblasting is a more intense preparation that uses small particles of abrasive material to clean and roughen the surface, allowing for better adhesion and a smooth finish. On the other hand, power washing is a quicker and less expensive method that uses a high-pressure stream of water to clean the surface.
In most cases, the best choice for surface preparation depends on the painting type and the condition of the existing surface. If the previous coating is badly deteriorated, it may be necessary to use more intensive methods, such as stripping or sanding, to prepare the surface for a new layer of paint.
When it comes to interior painting, DIY painters’ most common mistake is skimping on surface prep. Regardless of how much you spend on your paint or how fancy your tools are, a good surface will ultimately save your finished product. If you want your paint job to look its best, hire a professional residential painter. A reputable Cary interior & exterior painting company serving Raleigh can guarantee a clean and prepped surface that will last as long as possible.
Residential painting involves applying a fresh coat of paint to a single-family home’s interior and exterior surfaces. It is usually done by professional painters specializing in this type of work. They know how to select and prepare the right materials, choose the best colors, and apply them in a way that will last for years. They also know how to handle different types of stains, and they can advise homeowners on the best options for their homes.
The equipment a residential painter needs to complete a project will vary depending on the type of job they are working on. For example, if they are working on an exterior surface of a building, they may need a ladder and other safety equipment to reach the highest points of the structure. They also need tools for cleaning the surfaces, such as brushes, rollers, trays, drop cloths, and sandpaper. The type of paint used will also vary, with some painters preferring to use high-quality brands to ensure a good finish.
Commercial painters need equipment that is much different from residential painters. This is because they often paint larger spaces that require more sanding, etching, and prep work. They also need to be able to work around the schedule of businesses, which may mean they need to paint during off-hours or after-hours.
While residential painters typically focus on aesthetics, commercial painters are more concerned with durability and meeting their client’s specific requirements. They can offer various coatings and finishes, including metallic, textured, and matte. They can also work with multiple surface types, including masonry, wood, and concrete.
Whether you want to give your home a fresh look or protect it from damage, hiring a professional painting company is the best choice. They can provide quality service and expert artistry so your walls look beautiful for years. Residential painting can help you make your home feel more comfortable and welcoming to guests and add value to your property.
Residential painting must follow certain rules depending on the property’s location. Some areas are designated as conservation areas, Areas of Outstanding Natural Beauty, or world heritage sites, and you may need to get permission from your local authority before doing any work. In these cases, you should submit a planning application. This is usually required before you can carry out any work on a building or structure, and it can also apply to painting and decorating work.
Landlords often choose to keep tenants from painting due to the risks of doing a poor job or choosing colors that devalue the rental property. However, they might allow it if it is part of the terms of their lease agreement. It is also a good idea for landlords to include a clause in the lease that stipulates how long they will wait before repainting and what types of paint can be used.
Some homeowners associations (HOAs) take legal action against homeowners who paint their homes without their approval. This can result in fines and penalties affecting your ability to sell or rent your property. If you are planning to repaint your house without HOA approval, it is important to contact Singletrack Painting to discuss the situation with an expert.
Another thing that should be considered when selecting the right paint is its durability. A quality exterior paint should withstand the elements, including snow and rain. It should also be able to protect against sun damage and UV radiation. The best way to ensure your paint job is durable is to hire professional painters who use high-quality materials and follow proper preparation techniques.
It is common for a tenant to want to personalize their new apartment by adding their touch through interior painting. This is a great way to make the place feel like a home and add a personality touch. Some landlords, however, are unhappy with their tenants changing the color of the walls, so it is important to set a clear standard about this in the lease agreement. This will help avoid misunderstandings between the landlord and the tenant and ensure that the walls are painted in a neutral color that will not devalue the property.
What Is Brick Masonry?
Brick Masonry Charleston SC is an economical and durable choice for wall construction. Its insulating properties reduce energy costs. It is also a fire-resistant material.
Bricks can be formed using soft mud, dry-pressed, or extruded. Afterward, they are fired in a kiln to achieve strength.

Mud bricks are softer and have rough surfaces. They are suitable for temporary construction projects and arid climates.
Brick masonry is an art form with a long history that dates back to ancient man. The earliest bricks were sun-dried mud or clay and shaped by hand. The oldest bricks discovered date from around 7000 BC. They were found and were made of mud and straw. It wasn’t until about 3500 BC that bricks began to be fired in an oven or kiln. This was a major advancement that helped make brick buildings more popular than they had been before.
The earliest bricks were usually sloppy, but this only bothered builders a little since they were affordable and easy to build. Brick masonry has been used for everything from homes to bridges, and it can be combined with other building materials like concrete to make them stronger.
Masonry also refers to a mortar bond placed between individual masonry units, such as brick or stone. The mortar is what holds the bricks together and allows them to be stacked, either vertically or horizontally, into walls. Brick masonry can be structural, as in load-bearing walls, or decorative, as in a brick-veneer wall.
Historically, brick substrate materials were heavy, and processing them required significant human and animal labor to sift and lift them. Today, we have diesel and gas combustion engine-powered equipment that can lift thousands of pounds simultaneously, meaning brickmaking is faster and more efficient than ever.
Bricks can be produced using dry press, soft mud, or wire cut. They can be shaped by hand or with machines that create uniform molds. Once they are shaped, they must be fired in an oven to harden them. This process is what makes them more durable than mud or unfired brick. Buildings made from unreinforced brick are vulnerable to earthquake damage, so they must be retrofitted with steel to make them stronger.
Brick masonry construction can use different types of materials for walls. Masons mostly use clay bricks but can also utilize concrete blocks, stone, or terra-cotta. Typically, they use mortar as the bonding medium between bricks and other masonry units. Mortar is a paste consisting of cement powder, sand, and water. It often reinforces a wall’s structure and reduces cracking from temperature changes.
The choice of brick for a project depends on the type of wall and its function, e.g., load-bearing or decorative. The masonry must be correctly matched to the structural requirements of the building. Structural walls demand solid bonds between each masonry unit, while decorative walls can follow any bond pattern.
Besides bricks, masons use various tools to perform their jobs efficiently and safely. One of the most important tools is a wheelbarrow, used for hauling bricks, mixing mortar and concrete, and removing construction waste. Masons should also have a wire brush for ripping off chips and debris that get in their way while working.
A hammer is also useful to break apart bricks, especially large ones. A level is another tool to check the alignment of a wall. Before starting the construction, a mason should check the ground using a level or theodolite and mark the foundation layout. They should dry the foundation for a few days before constructing brick masonry. They should also dampen the bricks a few hours before construction to prevent them from absorbing too much water and improve adherence with the mortar.
Brick masonry can be built in many different shapes and sizes depending on the project’s needs. Architects often specify these shapes, including corner, lipped, troughed, or saddle-back bricks. The most common shape is a solid rectangular unit with a flat face and rounded edges. Bricks can also be cut into various shapes to fit in spaces where a full brick would not work. Some of the most common cut bricks are half or bat, three-quarter closure, king and queen closure. Each of these cuts produces a unique brick unit with different characteristics.
Bricks are typically used for the outer veneer layer of a structure rather than as load-bearing walls. This type of masonry provides a strong and aesthetically pleasing exterior while not contributing much to the overall structural integrity of the building. It also allows insulation to be installed inside, increasing the structure’s energy efficiency.
A wall can utilize six different brick bonding methods: English bond, Flemish bond, running bond, header bond, stack bond, and a wythe. These bonds are used to create a variety of aesthetic finishes and can be combined to produce multiple wall thicknesses.
While numerous masonry materials are available, brick is among the most versatile. It can be used for decorative and practical purposes and can accommodate various weather conditions. Brick is also an attractive option in cold climates, allowing it to absorb thermal heat during the day and retain it at night.
Choosing the right brick for your project will depend on several factors, including durability, cost, and the type of application. Brick masonry is usually rated by its ASTM specifications and is divided into four classes based on durability, strength, and load capacity. Architects should carefully review these specifications before selecting brick for their projects.
Brick masonry is one of the most versatile construction materials in the building industry. It can be used for various applications, from foundation walls to fences. It can also be used as a decorative element on walls. It is durable and resistant to abrasion. It is a good choice for outdoor structures because it is weather-resistant and can withstand high wind speeds. It also has a low water absorption rate and is easy to clean. It is also available in various colors, textures, and bonds.
Different bricks are named by their use, forming method, origin, quality, texture, and color. Some are extruded and have a consistent size and shape, while others are made through the soft mud or dry press. Some are sun-dried, while others are fire-dried. Some are manufactured with cement, while others are made from clay and sand mixed with lime or fly ash. A few types also have a lower compressive strength but offer the advantage of being easier to work with.
It is important to dampen the surface before starting work when laying bricks. This will prevent the bricks from absorbing too much water, which could lead to moisture damage. It is also important to place the bricks properly. For example, the frog side should be up when laying a stretcher bond. It is a good idea to use quoin closers at the beginning and end of the wall, as well as the corners.
Brick masonry is often used for garden facades, retaining walls, dividing walls, and chimney stacks. It is also useful in constructing floors and foundations. In addition, it is very durable and can withstand seismic loads. However, concrete block masonry is stronger and requires more plastering time.
Brick masonry is extremely durable but requires routine maintenance and inspections to keep it looking its best. The most important maintenance item is keeping water off brick surfaces. This is done by maintaining gutters and downspouts and ensuring that the wall’s grading and soil conditions are conducive to proper drainage. Brick walls should also have a “weep hole” (a small hole in the mortar) to allow moisture to escape. This should not be covered or blocked with debris such as rodent nests, leaves, or plant growth.
Another important issue is keeping bricks from mold, mildew, and moss. These can be removed with a mild bleach solution, one cup of bleach to a gallon of water, and applied with a synthetic scrub brush (not wire) after thoroughly soaking the brick. It is important not to use a wire brush because the steel will rust, leaving rust-colored stains on the brick.
Brick can also be damaged by water infiltrating the surface through joints and flashings that are not properly sealed. This is most often due to a need for more maintenance, especially in areas with severe weather. It is essential to check these areas frequently and replace the elastomeric caulking.
Another common damage to bricks comes from deteriorating mortar between the bricks, which can occur due to weather and other environmental factors. This can lead to spalling, which is when the outside surface of a brick breaks away. This is often seen at corners, near downspouts, and around windows. It can be prevented by regularly assessing mortar condition and tuckpointing as needed. It is also important to monitor the elastomeric caulking around doors and windows, replacing it as needed.
The Role of a General Contractor
A general contractor’s role is crucial to a project’s success. These professionals are responsible for transforming construction visions into realities while managing the budget and timeline. For more information, just visit the J&R Construction to proceed.
When hiring a general contractor, look for credentials and experience. It would help to consider whether they are licensed, insured, and bonding. A bonding company will cover any negligence or fraud committed by the GC, which benefits your project.

Project planning is a critical aspect of general construction. It involves creating a plan for the entire project to help control cost, quality, changes, risk, and schedule. It also includes determining the requirements of the project’s stakeholders and establishing the project deliverables. This project phase is important to get right, as it will set the tone for how well the rest of the project goes.
There are many ways to approach a construction plan, each with pros and cons. For example, some projects are primarily cost-oriented and include an overall cost management plan (CMP). This type of planning allows project teams to develop a strategic picture of the costs and estimated time for substantial completion. In contrast, other projects emphasize the scheduling of work activities over time. This type of planning is sometimes called activity-based project management.
A typical construction plan consists of an initiation stage, where the project sponsor or manager names a project manager and specifies goals and scope. It may also include a project charter, which outlines the project manager’s and other managers’ responsibilities, as well as the project budget and schedule. In addition, the initiation stage typically includes conducting market and feasibility studies.
The next step in project planning is identifying the work tasks required to achieve the project’s goals and objectives. The resulting work breakdown structure enables project managers to determine the resources needed for each activity and any necessary precedence relationships between them. These are commonly represented in a diagram known as an activity network. Ideally, these networks are checked by skilled project managers or formal computer scheduling systems to avoid common mistakes in construction planning.
These errors include specifying a circular set of activity precedences or failing to make essential precedences. For instance, installing wall framing should be done before finishing the floor, but if this relationship is overlooked, the two activities could overlap, creating expensive problems. In the latter case, it might be best to rework the schedule and reschedule the activities.
When developing a construction project, examining the internal factors affecting the schedule, such as staffing and resource availability, is important. This will help you identify issues and develop a strategy to overcome them. For example, you might need to add more resources or reschedule the work to meet deadlines.
Permits are essential to any construction project, as they ensure that all contractors follow a certain standard. They also help to prevent any accidents that might occur on-site and protect the property owners from liability. While permits create a lot of red tape, the standards they enforce are worth it in the long run.
The first permit that you will likely need is a building permit. This will usually be obtained by a licensed professional engineer or architect hired to work on the project. They will need to submit all of the necessary documents and designs for approval. The plans will then be reviewed to ensure they comply with local and state laws. If there are any objections, the plans will be revised accordingly. Once the plans have been approved, you can start construction on your new building.
A large construction project may also require a State Pollutant Discharge Elimination System (SPDES) permit to control stormwater discharges. This will be issued by the Department of Environmental Conservation (DEC). The new construction general permit, GP-0-20-001, replaces and updates the previous general permit for stormwater discharges from construction activities.
For sites larger than 1 acre, GP-0-20-001 requires an enforceable water quality management plan (WQMP). The WQMP must be prepared by a Certified SWPPP Developer and approved by the Department. The WQMP must include a detailed description of the construction activities and their impacts, including:
On linear sites, GP-0-20-001 requires that the operator maintain a natural buffer with vegetation. Buffers can be provided by maintaining existing vegetation, relocating vegetation, and providing supplemental erosion and sediment controls. In addition, the GP-0-20-001 requires that operators perform inspections within 24 hours of a rainfall event that produces 0.25 inches or more of rain volume on the site.
Several other considerations must be considered when applying for construction permits, including materials usage, health, accessibility design, and zoning bylaws. Understanding these requirements before starting a construction project is important, as failure to follow the law could result in costly fines or even criminal charges.
Whether it’s an entire home remodel or building a new commercial project, it takes a lot of different individuals to complete the task. In general construction, the GC often works with subcontractors who specialize in specific types of work, such as plumbing or electrical. This allows the GC to focus on the overall coordination of the construction project, scheduling, budgeting, resource allocation, and subcontractor communication.
In addition to working with specialized contractors, GCs have to deal with moving materials and labor. They must ensure that the correct men and equipment are in the right place at the right time to ensure that projects stay on schedule. This is why many GCs have teams of professionals experienced in project management and logistics.
Another important aspect of a GC’s job is to verify that all work done by subcontractors is accurate and meets the required specifications. This is especially true regarding electrical and plumbing work, which can be dangerous if not done correctly. A GC must ensure all subcontractors are licensed and insured and have the proper experience and expertise to complete the work.
If a subcontractor fails to meet the required standards, the GC must ensure that they are properly disciplined or terminated. This can be a lengthy process, but it is important to protect the integrity of the project and the safety of the workers.
A GC must work with the architect to ensure the project is constructed per the plans and specifications. They must also ensure all necessary permits are obtained and the site is ready for the next construction phase. GCs also need to provide utilities on the project site, secure the site, and perform engineering functions.
GCs typically conduct prequalifications for all subcontractors on their construction sites. They will request information on a subcontractor’s financial history, insurance coverage, bonding capabilities, project experience, etc. This helps them paint a clear picture of the type of contractor that they are hiring for a particular job.
Communication is an important part of any construction project. It allows crews to share information quickly and accurately. With proper communication, projects can stay on time and be more expensive than they need to be. Strong communication skills can improve team working relationships and help keep projects on track.
Communication happens when a message is sent, received, and interpreted. People communicate with each other using different languages, written or oral, and in a variety of settings. Some are private and public, while others may be social or professional. Communication can also occur between members of the same team or members from different teams. People usually talk to one another in person, by phone, email, or social media.
It is important to establish a hierarchy for any project early on and define lines of communication. This can be done through initial contracts, including the hierarchy for crew members, contractors and subcontractors, and the project owner. This can prevent confusion down the line and ensure that everyone clearly understands who is responsible for communicating specific tasks and requests.
The construction industry relies on good communication to stay on schedule and within budget. Poor communication is the number one cause of project delays and is responsible for lost profits. A study by the Project Management Institute found that ineffective communication costs $70-$100 million on construction projects each year.
A candidate must have strong project management and communication skills to be an effective general contractor. These skills allow the GC to meticulously plan and oversee construction endeavors while fostering a collaborative environment. Applicants must also be licensed, which requires passing an exam and meeting licensing requirements that vary by region.
A high school diploma is the minimum educational requirement to become a GC. However, some candidates complete a two- or four-year college degree in architecture, structural engineering, building science, and economics, among other subjects. In addition, a GC must have extensive construction experience and be familiar with all phases of the construction process.
Proper Deck Cleaning Can Help Preserve Your Deck For Decades
While scuffed baseboards, dust bunnies, and smudged windows might get the most attention during spring cleaning, don’t forget about your deck. With proper care, it can last for decades.

For mild stains and dirt, Deck Builders Charleston SC suggest using a liquid detergent diluted with warm water. For stubborn stains, use powdered oxygen bleach (not chlorine bleach) to treat the stain.
This vinegar-based cleaner works well for most wood surfaces and is safe around plants and landscaping. It’s also a better choice than some other cleaning products because it doesn’t contain any harmful acids that could damage the surface or leave behind an unpleasant smell. It’s a good idea to test the product in an inconspicuous area before using it on your entire deck.
This multifaceted cleaner can remove mold, mildew, and stains from many outdoor surfaces, including vinyl, fabric, concrete, brick, and stone. It’s nontoxic and doesn’t contain fillers or dyes, and it’s six times more powerful than standard vinegar. It’s also effective at lowering the pH of soil, cleaning patios and driveways, and eliminating odors from laundry.
One of the benefits of this product is that it’s ready to use, so you won’t have to mix up any ingredients. It’s also a good choice if you’re worried about the runoff from other cleaners polluting your lawn, plants, or waterways. It’s also a great option for cleaning other outdoor surfaces that require gentler cleaners, such as wicker or metal furniture, patios, and windows.
Before applying this cleaner, wet your deck so that it absorbs the solution rather than letting it evaporate into the air. Then, apply the cleaner according to the product label instructions. You can spray the cleaner directly onto stains, or you can use a deck brush to work it into the surface of your deck. It takes a few minutes for the cleaner to start working, and it should last anywhere from a few hours to overnight.
If your deck is heavily stained, it may take more time to clean it thoroughly. It’s also a good idea to remove any plants, grass, or other landscaping that can be damaged by the cleaner before you begin. Once the cleaner has soaked into your deck, rinse it with water from a hose.
Biodegradable Concrete Deck Cleaner
This cleaner is ideal for those looking for a non-toxic alternative to bleach. It is safe for the environment, free from chlorine and phosphates, and works well on wood, vinyl, plastic, metal, and composite decks. It can also be used on other outdoor surfaces like awnings, patio furniture, and decorative items. It can be applied with a mop, a soft brush, or a firm-bristled deck brush, and is even suitable for use with a pressure washer with a detergent injection system. The product comes in a one-gallon container that is concentrated, so a little goes a long way, and it can be used with different ratios of cleaner to water depending on how heavily soiled your deck is.
Unlike many other cleaners that require significant scrubbing to see results, this product works with minimal effort and is designed for those with weak or limited physical ability. It is formulated with a powerful chelating agent to lift dirt and grime, leaving your deck clean and ready to be stained. It is also safe for the environment and will not damage your plants or lawns when rinsed off.
A ready-to-use gallon of this product will treat up to 1,250 square feet of decking. It is a spray-on formula that can be applied with a pressure washer or a deck brush, and it is simple to rinse away with your garden hose. It can be used on both composite and traditional wood decks, but it is recommended to focus on those areas most in need of cleaning. It will leave a slight waterproof coating on the deck, so it is best to apply a stain right afterward to help protect it. Some deck cleaners can damage nearby grass or plants when they are rinsed off, so it is important to wet the surrounding area before applying this product. Some products also contain ingredients that may harm the surface of new or recently restained decks, so it is advisable to avoid spraying on these areas. If this is a concern, consider using a no-rinse option that will not damage the deck after it has been rinsed.
Oxygen Bleach Stain Remover
Oxygen bleach (sodium percarbonate) is non-toxic and the greenest of all the chemical cleaners. It works well on wood decks to clean mildew, mold, dirt, and the weathered gray layer that dulls wood. It’s also safe for use around plants and pets when used as directed. It’s the active ingredient in products like RMC Exterior Wood Cleaner, Wash Safe Canada Deck Wash, and OxiClean Versatile Stain Remover. When added to water, it forms hydrogen peroxide that breaks down and dissolves dirt and grime, killing mold and mildew and brightening wood. It’s safe for cleaning bare, painted, and stained decks and doesn’t react with any other treatment products like sealers.
When mixed with a bit of liquid dish soap, oxygen bleach is a great choice for a simple home-made cleaner to clean your wooden deck and remove mildew, mold, and other organic debris. Simply mix a gallon of warm water with a quarter cup of liquid dish soap, scrub the deck with a stiff brush, and rinse well.
If your deck is heavily soiled with grime and mildew, you may need to use a stronger deck cleaner. There are several different products available, including oxygenated bleach cleaners, oxalic acid deck brighteners, and even chlorine bleach. The best option for your deck will depend on the age of the deck and its condition, as well as whether it is stained or unstained, painted or sealed.
Before using any cleaner on your deck, test it on a small area to make sure the product won’t react with the stain or damage the surface of the deck boards. If it does, wait until the deck is dry before treating it with additional treatments.
Store aisles are full of different cleaners for your deck, but many homeowners choose to go the DIY route and make their own cleaning solution with household ingredients. Homemade cleaners are often cheaper and less toxic than commercial products. They’re made from ingredients that are safe for plants, pets, and humans, and they won’t react with other chemicals, including most sealers and paints.
Ammonia-Free Dish Soap
A deck is a pleasant addition to any home, but summer wear and tear from cookouts and backyard games can do a number on natural wood. Cleaning it regularly can help preserve it. Using the right cleaners can also keep it looking fresh and clean. Avoid any detergents with bleach or ammonia, which can damage the deck and strip away its sealer, exposing it to the environmental effects you sealed it to protect against.
Fortunately, you can make a cleaner from household items to effectively clean a wooden deck. A gentle cleaner that simply uses dishwashing liquid and water is suitable for most wood or composite decks. It is ideal for use between yearly deep cleanings to remove surface dirt and grime.
You can also mix your own more powerful solution to tackle tough stains and dirt. Some recipes call for rubbing alcohol to remove oily marks and other debris. Others include oxygen bleach to eliminate mildew, which won’t degrade the lignin binder in the wood like chlorine bleach does. According to Texas Capital, you can even combine soda ash with hydrogen peroxide for an effective stain-lifter.
Before you begin your deck cleaning, a light sweeping—ideally daily—will clear away most loose debris. A lightweight cordless blower, such as the Black & Decker 20V Max Lithium Cordless Sweeper, is a great choice for quickly clearing leaves and other organic matter before it can get ground into your deck.
After a light sweeping, apply your cleaning solution to the deck. Some recipes suggest rinsing the deck afterward to wash off the soapy residue, while others require scrubbing with a long-handled scrub brush in the direction of the wood grain. Always test a small area of your homemade cleaner for compatibility with your decking material and any nearby plants or landscaping, as some ingredients may damage them.
Whether you buy or make your own deck cleaning solution, always wear protection when applying it. A face mask, goggles, and gloves are a must to protect your eyes, skin, and respiratory system. A face mask will also help minimize the inhalation of vapors from strong chemicals and prevent irritation from the cleaners themselves.
Stucco Removal Tools
Stucco removal sounds like a scary and dangerous task. It involves a lot of electric jackhammering, hand hammering, and prying, among other tools and sounds.
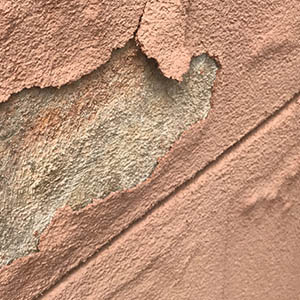
In fact, removing stucco is not as difficult or messy as it may seem. There are a few important things to remember when performing this task. However, if you need some professional help, you can contact Stucco Repair Philadelphia.
Stucco is a great material for exterior walls, providing insulation and protection from rain and wind. However, sometimes stucco can look dingy or worn, and many homeowners opt to remove it in favor of a fresh new texture that can be easily power-washed and painted.
Removing stucco is a large job that requires heavy machinery, including an electric jackhammer like those used to take up tile floors. It’s also a loud and messy process that creates a cacophony of noise with hammers hitting the bricks, tools clanging around, and occasionally workmen breaking out into song. It’s a job that should be left to a professional team that has the equipment and experience necessary for the job.
The first step in removing stucco is to locate a small area hidden from view and use a hammer and pry bar to loosen the stucco from the bricks beneath. Once this is complete, a chisel can be used to remove any large pieces that are still stuck to the wall. Be sure to wear safety gear, as stucco is very brittle and will crumble if you touch it with your bare hands.
Once the stucco is removed, the bricks will be exposed, and a new texture can be applied. This can be as simple as adding a color coat, or it can involve the addition of a base and color for a more finished appearance. A good stucco and plastering contractor will be able to advise homeowners as to whether this is the best option for them.
Another possibility is to cover the existing stucco with drywall, which is far easier and quicker than removing it. While this can lead to patchwork in the ceiling, it may be a better solution for those who are not reworking their ceiling anyway and will save them time and hassle later.
Cracking is a normal part of the process of aging and should be expected, but if the cracks become wide or interconnect, it may be time to talk with a stucco removal professional about replacing the old surface with a more durable one. The costs of a full replacement are usually much less than refinishing and painting, so it makes sense to consider it if your home or business is in need of a facelift.
Sledgehammer
A sledgehammer is a heavy, flat, broad metal tool that’s designed to distribute the force of impact over a large area when it’s swung. It’s used for many construction projects, including breaking up concrete and brick. There are a number of different sizes and designs to choose from, so it’s important to use the right tool for your job. For example, if you’re working on a small project, a three-pound sledgehammer may be enough. On the other hand, if you’re working on demolition work or tearing down walls, you may need a much larger 10-pound model.
Before beginning any stucco removal project, you should always make sure to wear appropriate safety equipment. This includes a hard hat, protective goggles, and work gloves. It’s also important to clear the work site of any potential hazards, such as loose debris or electrical wires.
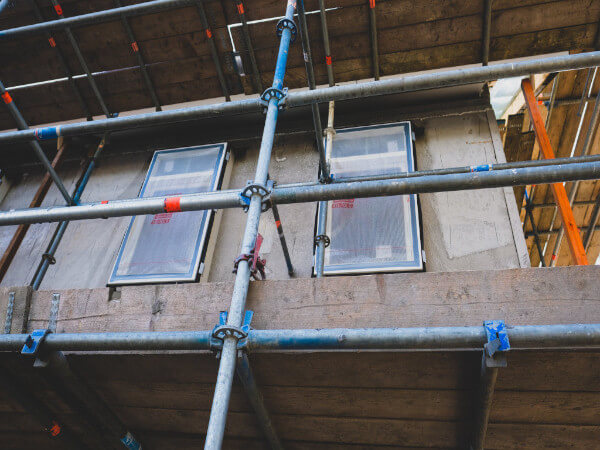
Once the work site has been cleared, workers will begin by laying out tarps to catch any falling debris and erecting scaffolding where necessary. Next, they’ll use a sledgehammer and pry bar to remove any loosened stucco. After this, they may need to break up the surface of the wall with a crowbar or hammer in order to expose any nails that are embedded within it.
After the nail heads have been exposed, workers can continue to cut through the stucco with a circular saw equipped with a masonry blade. For best results, it’s important to start with the outermost layer of the stucco and cut straight lines across it. This will help to prevent any cracking or other damage that can occur as the saw cuts through the material.
The next step is to gradually increase the blade depth until it reaches the metal lath beneath. Once this is done, the stucco can be completely removed from the wall.
When it comes to removing stucco from a brick building, the process can be more complicated than on a home with a wood frame. However, an experienced team of contractors should be able to tackle the job with ease. They’ll usually start by using a sledgehammer and pry bars to cut away the first layer of stucco, then move on to using a circular saw with a diamond blade for more precision.
Pry Bar
A pry bar, also called a crowbar or demolition bar, is an essential tool for home and commercial renovations. It’s a hand tool made of steel with one end that’s constructed for prying and the other with a chisel-like edge. A pry bar is a versatile tool that helps with projects like removing stucco, moving furniture, or even rearranging pictures on your wall. A good-quality pry bar is sturdy enough to resist corrosion and rust, which makes it the ideal choice for a DIY project.
The first thing to remember when using a pry bar is to always wear safety gear, including safety goggles and work gloves. This will protect your eyes and fingers from flying debris and help prevent injuries. You should also use a tool bag to hold your tools and other supplies. It will keep them organized and protect them from falling items or getting lost. Finally, if you’re going to be using the pry bar for a long period of time, it’s a good idea to use a pair of padded wrist guards.
To use the pry bar, position it between the molding and the wall in a crevice. If necessary, cut through any caulk at the seam with a utility knife. Next, gently tap the flat pry bar end with a mallet or roofing shovel to wedge it into the joint. After that, slowly pry the molding away from the wall until you’re able to remove it completely.
If nails are still sticking out of the trim, a nail puller built into the flat pry bar is the easiest way to remove them. Slip the bar’s nail slot over a nail head, then twist and push to ease it out of the hole.
If the nails are really stuck, some people prefer to score the molding first with a sharp utility knife. This will weaken the connection between the molding and wall, making it easier to pry off. Afterward, you can use the pry bar to separate it from the wall and then use a power drill to remove the rest of the wood siding and drywall.
Circular Saw
When it comes to cutting through stucco, the right tools are necessary for a safe and effective job. A high-speed side wheel grinder works well for the most difficult cuts, but it is also a good idea to use a circular saw with a diamond cut-off blade for a smoother finish and more precise work. If you’re working on a larger project, consider asking a friend or two to help so that you can safely and quickly remove the stucco.
A circle saw is a powerful and versatile power tool, making it a great choice for cutting through stucco. It is easy to control and can give you a smoother, more precise cut than an angle grinder. Before you start using your saw, ensure that it is in good working condition. A quick check will reveal any issues that could cause damage to your body or the materials you’re working with.
The most important step in using a circular saw to cut through stucco is ensuring that the blade is properly adjusted. The best blade to use is one designed to cut through masonry, such as a carbide-tipped or diamond-tip blade. Adjust the blade so that it is nestled into the hole in the drill chuck, and then carefully begin your cut. The saw should stray from your line of vision occasionally, but you can correct this by aligning it against a straight edge, such as the factory edge of plywood.
You should also make sure that you are wearing the proper protective equipment when working with a circular saw. This includes eye protection to keep the dust from splintering and a mask to protect your lungs from the dangerously toxic fumes generated by the saw.
Another key to working safely with a circular saw is to cut the stucco into small panels. This makes it much easier to manage when removing the material, and it will also make the process go much faster. In addition, it will prevent you from creating a large pile of debris that is difficult to dispose of.
The Pros and Cons of Roofing Replacement
If your roof has taken a beating and don’t want to deal with the hassle of roof repair, you may consider hiring Buckley Roofing & Stucco. However, before you make the decision, it’s important to consider some of the pros and cons of this project.

Cost: The price of roofing replacement depends on several factors. Some are outside your control, such as geographic location and weather, while others are within your control, such as the materials used.
When it comes time to replace your roof, there are many different factors that can impact the overall cost. Your choice of shingle type is one of the biggest, as is your location and what materials you choose to use.
Asphalt shingles are the most common, but there are other options as well. For instance, you can go with a metal roof or a solar-powered one. These options are usually more expensive than their basic counterparts, but they also offer more options for customization.
The roofing material you choose will have a major impact on the overall cost, as will the pitch and size of your roof. The larger your home and the steeper its slope, the more labor you’ll need to finish the job.
You’ll also need to consider any unique features, like chimneys or skylights. These elements add to the overall labor costs since they require more time to install.
A typical roof replacement cost can range anywhere from $5,700 to $12,000, and it will include the removal of existing shingles, soffits, and underlayment. You’ll also need to pay for the installation of a new ridge vent, flashing, and drip edge (a strip of material installed on the eaves that redirects water off the roof).
If you’re interested in a tile roof, expect to pay between $8,200 and $22,000. Tiles are durable and come in many styles, so you can customize your home’s appearance.
Another factor that may affect the total cost of a roof replacement is structural issues, which can impact rafters and trusses. These problems can be a major source of leaks or damage to your roof.
Depending on the age of your home, it may be necessary to have structural repairs done, such as replacing trusses or re-framing your roof. These repairs can be pricey, so it’s a good idea to have your local building inspector inspect the project before you commit.
You can help reduce the cost of a roof replacement by researching any home improvement grants that may be available to you. These programs are designed to support homeowners with low incomes who need repairs or maintenance work done to their homes. Some are offered by the Department of Agriculture and others by state and local governments.
Roofing replacement can enhance the look of your home as well as improve its performance. Modern shingles are designed to withstand harsh weather conditions and pass EPA and ENERGY STAR standards. They may even help keep your energy bills low. In addition, a well-designed roof can improve your home’s indoor air quality and make you feel more comfortable at home.
As with any home improvement project, a little research goes a long way. It’s important to choose a reputable, locally owned company that knows your area. A good contractor will be able to advise you on the best materials, colors, and styles for your property’s needs.
The roof is one of the most visible areas of your home, so it should be treated with the utmost respect. This includes selecting the most flattering roof color for your style and architectural preferences, as well as ensuring that the roof is installed correctly and properly sized for the job at hand.
In addition, you want a roof that does its job, and you’ll be happy to know that there are numerous options out there for every type of home. From traditional wood shingle to a more modern metal option, there’s something out there for just about any homeowner.
The right roof can increase the value of your home and decrease its operating costs in the long run, which means a larger return on your investment over time. As a result, it’s an excellent investment in your family’s future. A new roof also has the capability of improving your home’s energy efficiency, which can have a dramatic effect on your monthly bills.
ROOFING EXPLAINED
Roofing is the process of constructing a building’s outer covering. It encompasses all materials and constructions used to cover the top of a building. A roof protects against weather conditions and is essential to a building’s envelope. For this reason, it is important to understand all roofing aspects and choose the right material for your project. Read on for more information about roofing. Once you know what roofing is, you can start your project.

Roofing Contractors is an essential part of the building process. A roof can be costly to replace, but a reroofing project can save you a lot of money. The costs are considerably lower than the cost of replacing the entire roof. There are several benefits to reroofing, and one of them is that it requires less labor and time. It can also save you money because you don’t have to tear off the roof. If you have a valley on your roof, cut off excess shingles. To do this, use a utility knife with a hook blade. You can also cut off any overhanging shingles to use elsewhere on your roof. Once you’ve completed a roof, you’ll be able to install a shingle cap or a tarp. As long as the shingles are evenly spaced, you’ll have a new roof in no time.
Besides roofing materials, there are also many other roof types. Turf roofs, also called sod roofs, are becoming increasingly popular because of their high-insulating properties. This type of roof is also popular because of its “green” benefits. The vegetation and soil beneath the roof act as living insulation, regulating the temperature inside the building. Adobe roofs, made of clay and binders, are another common type of roof. These are typically used in low-rainfall regions.
Reroofing costs vary a lot. The materials used, labor, and the size of the project all play a role in the cost. The larger the roof, the more the job will cost. The more complicated the job, the higher the cost. Also, the more time it takes to complete the project, the more expensive it will be. If you don’t have much experience with reroofing, consider hiring a roofer. If your roof is leaking or has signs of rot, it’s time for a reroofing. Even if you have a rotted deck, a reroofing project can still give you a quality roof that will last for years. To ensure that your reroofing project is a success, be sure to choose quality roof shingles. These shingles can last for a decade or longer.
If you’re hiring a roofing contractor, check out all the safety and health requirements for this project. Regardless of which type of roofing materials you choose, you’ll need to prepare the roof for the project. It should be thoroughly cleaned with a tarp or cardboard underneath. You’ll also need to rent a trash bin. Make sure the bin is parked close to the house so you can easily dump old roofing shingles into it. This will keep your home looking clean while ensuring the crew’s safety.
While clay tile is popular, you can consider many other materials for your roof. For example, concrete tile is cheaper than clay tiles and has similar installation techniques. It is also made of a standard sand mix concrete and is available in various profiles that resemble wood shakes and rolled clay tiles. You can also find concrete tile that has a decorative finish. While concrete tile is a heavy roofing material, it is also one of the most durable and inexpensive options. Depending on the material, it can last up to 50 years or more.
While asphalt roofing is the most common choice for a flat roof, other options can better suit your home’s unique design and construction needs. Some of these roofs are specially designed to reflect the sun so that the interior is more airtight. For example, you can install a built-up hot-tar system on a flat roof. Another option is a peel-and-stick version of modified bitumen sheets that don’t require professional installation. Finally, liquid-applied fiberglass and acrylic may include an embedded fabric. Roofing is a complex process. While you can use any material for your roofing project, you must know about certain materials before starting a project. For example, a full-size shingle could make a hump in the roof, and might be less attractive than a half-size shingle. You need to consider all of these factors when choosing the type of material for your project.
Looking For Unique Yet Easy Home-Improvement Ideas?
As a homeowner, you may want to spruce up the place simply to change the general atmosphere or even to add a lot of value to your home in order to refinance for lower monthly payments. Regardless of your reasons for wanting to take on a project, you should first take some time and read these home improvement tips.
Do you need to fix a hole in your wall made by a nail or screw. Create a divot in the wall with the rounded end of a screwdriver by pressing it into the screw hole. Next, use spackle or drywall compound to fill the divot. This will give you a nice smooth wall surface.
Having a small kitchen doesn’t have to be all bad. Since you have limited surfaces and space to work with, make sure to purchase a sink with a deep bowl. Then add some elegant high- end faucets to match the rest of your kitchen. You can easily create a feeling of space without having to compromise the rest of your home.
Try to keep the amount of pictures you nail to your wall to a minimum. Many people seem to get carried away with dozens of photographs and prints hanging on the wall. Add about 4 to 5 pictures to your wall, arranged in nice frames, to create a dramatic, but uncluttered look.
If you don’t want to refinish your old and weathered wooden floors, you can instead, give your home a cottage style boost. Buy some oil based paint and choose some affordable stencils. Use the stencils and paint to re-design your wooden floors. Add some cute designs in varying patterns, to give a full on-cottage look to your home.
After reading these tips, you are one step closer to finally making those repairs or upgrades. What’s the next step, you ask? Well, proper implementation of the above tips and tactics is how you want to proceed. No shortcuts here; apply exactly what you’ve learned for the best results.
You can also visit our other website and post your article.
Charles Coble Painting, Word of Mouth Plumbing, Agatha Amelia, Summit Solve, Isla-Developments, Roofing Companies, Pwarome, Laundry Source, Solar Fountain, Copper Dot Digital, RVA-Technologies, Mehta Carpets, Mass Limpiezas, Nijjar Drywall, The Hour Glass Show, Middle Class Union Made, Tampa Web Design, Coroando Concerts, Ira Strategies, Food As Medicine Summit, Hopewell Mustangs, Hummer Of Columbus, Lucky Strike, Mexico’s Orto Don Ciaen Tours The US, Ottawa Freedom Center, Water Saver Faucet, Integrated Transport, Lotus Integrated, MSAZ Homes, San Clemente Girls Softball, Choose Hoverboard, Contribute to the Hearts, Luxury Log Home Builder, Nobody Is There, Soul Persuit, Tyler Tree House Design, Big Lil Seattle, Construction Stop, Dental Tourism In Romania, Global Bionalysis Consortium
Hiring a Handyman to Help You With Home Improvement Projects
 Home improvement includes many things. It can be the fixing up of a house to make it livable, making it more comfortable, adding extra rooms, or even creating an addition to it. Home improvement also means repair, upkeep, replacement, remodeling, modification, acquisition, construction, or conversion to any part or structure. Visit this website at https://louisianahome.center/ to learn more about home improvements.
Home improvement may mean replacing an outdated roof or adding insulation for older houses. Still, for newer houses, home improvement may include:
- rehabbing the structure to make it more energy-efficient
- extending the living area of the house for an additional room
- extending or installing a sliding glass door to give better access to the backyard or front yard
- repairing leaky faucets and roofs
- painting the house to make it more appealing
- adding security devices to the property
- even building a swimming pool for recreational use.
Whether the project is for personal use, profit generation, or business development, home improvement projects should be approached with careful planning, involvement from all involved in the process, and a clear plan for accomplishing the goals.
home improvement
When it comes to home improvement, there are two main types of services being offered: those performed on the property itself and those performed on the home’s exterior. For the home itself, there are many services to consider. One of these is exterior remodeling. Exterior remodeling services range from minor repairs like repainting, roofing, siding, and landscaping, to major renovations like a kitchen remodel or a pool renovation. Major projects, like a pool rebuild or kitchen remodel, require specialized contracting services from experienced contractors who have experience in constructing large structures and extensive remodeling work.
In addition to home improvement services on the property itself, many companies offer services for improving the exterior of the home. Some of the most popular exterior remodeling services include vinyl siding, guttering, painting, and roofing. Here are some more services to consider:
Home improvement and remodeling services on the exterior of your home can range from minor to dramatic. For example, a home remodeling group may choose to replace existing windows and add new features such as vinyl siding. Vinyl siding is one of the most durable and attractive exterior materials available today. In fact, it is so durable and attractive that many homeowners choose to purchase vinyl siding for their home improvement projects. A vinyl siding remodel job can make your home look significantly better than what it did the first day it was installed.
If you live in a home with a single bathroom, a good home remodeling group will consider not only re-bathroom services, but also other services necessary to complete the job. For example, suppose your home is a bit older and needs a complete renovation of the bathroom. In that case, a local office might be able to provide the materials for your bathroom renovation. These materials include: shower kits, countertops, tile, and flooring.
Sometimes there are unexpected problems that occur with home renovations and repairs. A quality handyman company will work with their clients to determine what steps they need to take, how long it will take, and the cost. By helping my fellow homeowners get the most value and enjoyment out of their remodeled or repaired homes, we can all succeed.
An Operator’s Observations: Top 5 Video Episodes of The Dirt for 2021
2021 marked a new year for “The Dirt” and a new host.
Bryan Furnace began hosting the weekly videos in July, bringing his experience as an equipment operator to a broad range of topics for contractors and the construction industry as a whole.
From interviews to commentary, Bryan delivers his ground-level, straight-forward perspective to bear on everything from retaining employees to the infrastructure bill.
Here are Bryan’s top five Dirt videos from 2021, as determined by the most views on equipmentworld.com:
(Want to make sure you don’t miss an episode of The Dirt? You can do so by subscribing to our Equipment World Daily Report newsletter or the Equipment World YouTube channel. We also post a new episode each week at equipmentworld.com.)
1. How Does the Infrastructure Bill Affect Contractors?
In this episode of The Dirt, we give you all the important details of the $1 trillion infrastructure bill, which has since become law, and how it affects contractors. Bryan interviews Daniel Fisher, senior vice president at the Associated Equipment Distributors, to find out what’s in the massive legislation – and what’s not. Though this interview took place before the bill’s passage, the information on the legislation remains relevant.
2. The Chip Shortage: How Did We Get Here?
The microchip shortage has been contributing to lower inventories for some equipment manufacturers. A variety of factors have coalesced into a perfect storm, creating a scarcity of chips. Long wait times for new chips are just the tip of the iceberg. Bryan breaks down the many reasons why it might be a long while before we see inventories balance out demand.
3. Construction’s “Weird Disconnect” with Young Workers
The old-timers’ constant refrain that the younger generation doesn’t want to work meets an unspoken reality. Many high school graduates have never done real manual labor and have no idea what to expect on a jobsite. That, combined with construction’s tradition of yelling at workers who make mistakes, is leading many young workers to wrongly conclude they’re just not cut out for construction. So they quit. After spending time talking with young workers, Bryan embarks on a discussion on how the construction industry can bridge this “weird disconnect.”
4. “No Call, No Show” Employees: Is This the New Normal?
Along with hosting The Dirt, Bryan is a part-time equipment operator who often fills in for employees who don’t show up for work. Not only are he and others throughout the construction industry seeing more no-shows, but there’s a growing trend of those workers not calling to let their employers know they’re going to be absent and when – or if – they’ll return. In this episode, Bryan discusses his observations of the problem – which appears to be more prevalent among worker 25 and under – and a possible solution.
5. Are You Playing ‘Musical Cabs’ With Your Operators?
Moving operators around frequently to different equipment can hurt contractors in the long run. Though it’s not always possible to keep an operator with the same machine all the time, the rewards for doing so as much as possible can mean big boosts for your two biggest assets: your employees and your equipment.
Equipment World serves up weekly videos on the latest in construction equipment, work trucks and pickup trucks — everything contractors need to get their work done. Subscribe and visit us at equipmentworld.com!
Did you miss our previous article…
https://constructionosa.org/?p=1315