Home » Flooring Services
Category Archives: Flooring Services
Hardwood Floor Refinishing Costs
Hardwood Floor Refinishing Bergen County NJ is an affordable way to revitalize old hardwood flooring. It can make your home look more attractive, and it’s also environmentally friendly.
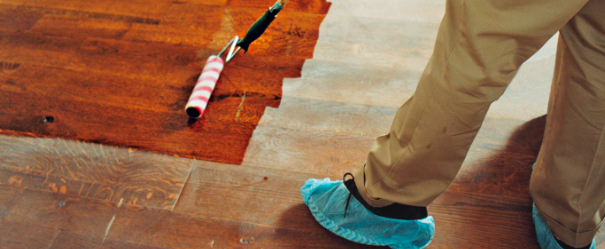
To refinish your floors, you’ll need to remove all furniture from the room and tape off doors and outlets. Vacuum the room thoroughly before you start sanding. Start with a medium-grade sanding disk and move up to a finer grit.
Refinishing hardwood floors can be a costly project. The total cost varies depending on the size of the working area, the type of wood, and the level of damage. Generally, up to 80% of the final cost is spent on labor. In addition, the flooring contractor must pay for the equipment used, stain, topcoat and other materials. The costs of removing carpeting, repairing damaged floor boards and cleaning can also add up.
The first step is to remove the shoe molding, which covers the trim around the edges of the hardwood floor. To avoid damaging the molding, use a small hammer and a pry bar instead of a crowbar. After removing the shoe molding, it is important to clean the area and prepare for refinishing.
Next, the hardwood flooring is sanded down with large drum and belt sanders. This is a time-consuming process and must be done carefully to avoid thinning out the floorboards or producing an uneven finish. If the flooring has deep scratches, gouges or dents, they must be filled and sanded again. The sanding process is usually followed by a stain application and then a polyurethane topcoat.
Stain colors can add up to an additional $0.50 to $0.75 per square foot to the refinishing cost. The sanding process will also require the flooring to be “waterpopped.” This is a process that opens up the pores of the wood for more consistent stain penetration, and can help achieve darker finishes with less streaking.
If your hardwood flooring is in good condition and doesn’t have deep scratches or dents, it may be possible to skip the sanding step and just recoat the floors. This option will save you money and still give the floors a fresh new look. However, you should know that this will only prolong the life of your hardwood floors and won’t fix major problems.
Time
Hardwood floor refinishing is a labor-intensive process, and it can take up to seven days to finish the job. This timeframe is dependent on the size of the room, the type of stain used, and the wood species. It is also influenced by humidity and the amount of work that needs to be done.
Before starting a hardwood refinishing project, it is important to plan ahead. This includes making a list of the furniture to be moved, creating a plan for dust control and management, and removing any nails that are sticking out of the trim. It is also important to have the right tools for the job and to choose a sander that is suitable for the task.
The first step in refinishing hardwood floors is sanding the surfaces. A flooring professional can sand about 1000 square feet per day, using a rough pass, edge pass, and a trim pass. However, it is important to keep in mind that the sanding process can take two or more days for large areas.
After the sanding process is complete, it’s time to add the stain. It’s best to use a water-based polyurethane, which dries much faster than oil-based products. Water-based products are also eco-friendly and easier to clean up than oil-based ones.
Once the stain is applied, it’s important to wait at least 24 hours before walking on your newly finished floors. You should also wait four days before moving your furniture back into the room. This will allow the new finish to cure properly and maintain its appearance over time.
It’s also a good idea to test out different stain colors on sample boards before your refinishing project begins. This will ensure that you get exactly the look and color that you want.
Experience
Hardwood floor refinishing involves sanding the hardwood floor down to its raw wood surface to erase scratches, dents and stains. Refinishing is more expensive than resurfacing but it can last longer and requires less maintenance than replacing the floor. The cost of refinishing varies according to the type and thickness of the flooring and the amount of damage.
A solid hardwood, such as oak or maple, is relatively easy to refinish. Softer or exotic woods can be more difficult to work with, and the refinishing process may take more time. It’s important to choose a flooring contractor who has experience with your particular species of wood. It’s also recommended that you get multiple quotes from contractors before making a decision.
Having your hardwood floors refinished by professionals can make them look like new again and help you avoid the expense of replacing your wood flooring. It’s important to keep in mind, however, that refinishing can cause additional wear and tear on the floors in the future, so it is necessary to plan for ongoing maintenance.
Refinishing can also be used to change the color of your hardwood floors. You can choose from a wide range of Bona stain colors and waterborne finishes to create the look you want. You can also opt for dustless refinishing, which uses commercial vacuums to minimize the mess and disruption to your home or office. Whether you’re looking for a quick touch-up or an entirely new look, Bona floor refinishing is the best way to revitalize your hardwood floors. For more information, contact a Bona Certified Contractor (BCC). They’ll be well-versed in the latest trends and deep-rooted in the newest refinishing technologies to give you a quality result.
Wood type
Whether your hardwood floors are oak, cherry or some other species, the type of wood can have an impact on the cost and time to refinish them. Some hardy woods such as hickory can hold up well to high levels of wear and tear, while soft woods such as southern yellow pine may dent or scratch easily. The quality of the finish on your floors is also a factor that impacts refinishing costs. For example, oil-based finishes require more effort to work with than water based ones.
The type of wood used for your floors also affects their durability and ability to withstand moisture. For instance, a solid hardwood floor made from maple is very durable and has a natural resistance to damage from moisture. Likewise, hickory is another popular choice for its durability and beautiful grain pattern. It has the highest Janka rating on the hardness scale and is one of the more water-resistant types of wood available.
Other good options include birch, beech, and padauk. While birch is not as hard as oak, it is very strong and can stand up to moderate amounts of foot traffic without scratching or denting. Beech is also a good choice because it can take stains well and is very durable. Padauk, which is sometimes referred to as vermillion, has a similar appearance to mahogany but at a more reasonable price point.
While engineered wood is an excellent choice for homes with limited space, it is important to check the thickness of the veneer before refinishing. If the layer of veneer is too thin, it can be difficult to sand it down without accidentally exposing plywood underneath. Typically, you want at least 1/8″ of veneer left in order to safely refinish your floors.
DIY
Depending on your skill level, you can save money by refinishing hardwood floors yourself instead of hiring a professional. However, it is important to understand that it is a messy job that requires special equipment. Before you start, make sure that the room is well-ventilated and free of furniture, curtains and pictures. It is also a good idea to wear a dust mask. The process of refinishing hardwood floors is also time-consuming. You may need to wait at least 24 hours for each coat of polyurethane to dry.
You can start by vacuuming and sweeping the floors to remove any dirt or debris. Then, thoroughly clean the floor using a damp cloth or mineral spirits. This will help prevent the new finish from adhering to old stains or the wood itself. It is best to do this before you begin the refinishing process.
A few days after you have sanded the floor, apply a coat of water-based polyurethane and let it dry completely. Once the first coat has dried, lightly sand with 220-grit sandpaper. This will smooth the surface and allow the next coat to bond properly.
After sanding, you can add more coats of polyurethane to the floor. Make sure to follow the instructions on the label for each product. Also, keep in mind that water-based polyurethanes often require more coats than oil-based products.
As with any DIY project, it’s important to consult with people who are familiar with refinishing floors. This could be a person at your local hardware store, a contractor, or someone who has refinished their own hardwood floors. It’s also a good idea to discuss your plans with a friend who has experience working with power tools and other home improvement projects.
When You Need a Floor Repairman
If your floors are scratched, dented, or buckled, they need a professional. While you can do some wood floor repairs yourself, it’s best to call a specialist when structural issues require fixing. Hardwood flooring can be scratched by pets claws, furniture legs, and even dragging heavy things over it. Scratches are often easy to fix but can make your floor less durable.
A floor repair contractor specializes in repairing, restoring, and maintaining flooring materials in residential, commercial, and industrial settings. They are skilled in assessing flooring damage, identifying the best repair options, and performing the necessary repairs to ensure the floor is safe, functional, and aesthetically pleasing.
Wood is a great material for furniture and floors because it can withstand everyday wear and tear but can suffer damage over time. This can be caused by excessive moisture exposure, leaking appliances or improper installation practices. Water damage is a major cause of problems with furniture and floors, resulting in warped, stained or rotting surfaces. It can also lead to mold infestation and lower the value of a property.
The first step in repairing damaged wood is to identify the problem. This will help you decide whether to replace the wood, fix it by adding supports or remove it entirely.
Termites and wood rot are two major issues that can be hard to diagnose, but both cause significant structural damage in homes. Both require professional pest control services to get rid of the critters and treat the damaged wood.
If you suspect a termite infestation, call a licensed pest control company in your area to get an estimate and schedule a visit. These professionals can use a variety of insecticides and baits to eliminate the colony, then apply chemical treatments directly to the affected areas of your home.
Once the termite colony is gone, wood rot can be fixed by scraping out the affected wood and treating it with fungicide. If the rot is extensive, it may be best to replace the wood altogether.
Wood-boring beetles and longhorn beetles can also cause rot in wood by digging long tunnels in the underside of the wood. These tunnels are difficult to detect because the tunnels usually only have circular holes that can be seen from the outside.
Fungi are another common cause of wood rot. They eat through the cellulose and lignin that make up the wood skeleton, causing it to weaken. Some fungi can affect the strength of the wood by staining it, while others can completely destroy the skeleton and leave it crumbly.
If you have a wood floor that has been damaged by water, it is important to repair the damage as quickly as possible. This will save you from the expense of replacing your hardwood flooring.
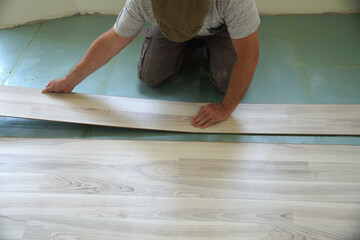
While laminate floors are incredibly durable, they can still get scratched and chipped from normal wear and tear or other problems. It’s important to repair minor scratches and chips as soon as they appear on your floor. Depending on the type of damage, there are several different ways to fix it.
For scratches and chips that are caused by a heavy amount of traffic, or by household pets or items dropped on the floor, you can usually repair them using a laminate repair kit. These kits are available in a variety of colors, and they are easy to use.
You can also use a repair putty to remove small scratches and gouges from laminate floors. These are often found in your floor’s manufacturer or can be purchased at a home improvement store.
If the scratches are quite deep and there’s a lot of damage, you might need to replace the board. This is especially true if the planks are made from a thin-surfaced wood product.
Water is another common cause of damage on laminate floors. Most water spills aren’t harmful to the surface of the floor, but they can eat through boards over time if they remain in place for a long period.
To avoid this, make sure your laminate flooring is dry after spills and that you clean up any stains immediately. If you’re dealing with a large stain or one that isn’t easily removed, consider hiring a professional to come in and remove it.
The best way to repair buckling or lifting laminate floors is to figure out the source of the problem. A lack of acclimation before installation, poor expansion gaps in the flooring or high temperatures can all be culprits.
A buckling or lifting laminate floor can be a big problem, and it can affect your overall comfort in the room. It can be difficult to figure out exactly what’s going on, but figuring out the issue and fixing it can prevent future damage.
Typically, the damage caused by buckling or lifting laminate flooring is due to water or heat. This is because the flooring can’t expand and contract with temperature changes, so it buckles or lifts in the areas where it gets hotter or colder.
If your concrete floors are looking worn or the walls are showing signs of cracking, it is time to call in a floor repairman. This is a common issue and can cause major damage to your home or business if left unattended for too long.
A number of factors can cause concrete to show signs of damage, including a lack of waterproofing, poor installation, and plumbing leaks. This can lead to moisture seeping into the surface of the concrete and causing it to crack, which can then lead to serious structural problems.
Excessive water can also affect concrete by reducing its strength, curing and drying shrinkage, porosity, and abrasion resistance. This is why many concrete foundations are designed to be waterproofed, as this will help to ensure that no water enters the concrete and causes damage.
Fire and other sources of intense heat can also destroy concrete, affecting it mechanically and chemically. This can result in a wide range of concrete damage, from cracks and spalling to discolorations that may be visible to the naked eye.
Humidity is another factor that can negatively impact a concrete slab, as it increases the pH level of the concrete and weakens its bonds. This can lead to differences in concrete slab leveling, making them appear uneven.
These problems can be fixed by a floor repairman using different methods, such as patching or replacement. These techniques will depend on the severity of the damage, but patching typically involves adding a thin layer of material to cover the damaged area and provide an even surface.
When choosing a concrete repair company, make sure to consider experience and reputation amongst other consumers. This will give you peace of mind that the work will be done properly.
In addition, look for a repair company that can offer you competitive pricing and is willing to stay within your budget. This will save you time and money in the future.
A concrete repairman will be able to identify any issues with your concrete and determine the best course of action to fix them. This will save you money and ensure that your concrete is safe for use in the future.
A broken tile is not only aesthetically unappealing but it can also be a safety hazard. Children or pets may accidentally step on cracked tiles and cause injury, while water can penetrate cracks and damage the subflooring beneath.
It is important to repair damaged tile as soon as possible. Not only is this a good way to save money on repairing or replacing tile, but it also prevents further damage from occurring.
The first step is to inspect the tile itself to determine whether or not it is broken and how severe the crack is. This will help you to decide how much of a repair you can make.
Usually, broken tiles are caused by objects hitting them from a height. For instance, someone may drop a heavy piece of furniture or a cast iron pan while washing up in the kitchen.
If the crack is isolated within a specific tile, it can be fixed easily. However, if the crack is extensive and it extends across a number of tiles it can be more difficult to fix.
Before you can repair the tile, it is important to remove any existing grout and replace it with new. This is an easy, inexpensive and quick process that will give you a clean and smooth surface to work on.
To repair a crack, apply a high-quality epoxy adhesive. This is an inexpensive and versatile repair product that will allow you to fix almost any type of crack or chip, according to Home Depot. You can also use it to fill in holes in drywall or other materials that have been damaged.
Once the epoxy is dry, paint over it with a color that matches the surrounding tile. This will help the repair stand out less than a rough patch or an unmatched color.
If the crack is too wide to repair, it may be necessary to replace the tile entirely. You can find spare tile at your local home improvement store or ask the previous homeowner if they have any extras that could be used for this purpose.